

Sloped Yard? No Problem!
There are several different ways to install a raised-bed garden on a slope, but I prefer this five-step method. It's fast, relatively easy, and inexpensive. You don't need any special skills or big machinery. You just need to be able to use a shovel.
Here are the five steps my garden installation company uses to install raised beds on slopes.
Supplies
There are some supplies you'll need to buy or borrow in order to use this quick method to build raised beds on a slope:
- REBAR OR STAKES: You need something tall to use to mark the front and back corners of your garden space.
- TWINE OR STRING: You'll tie this between the stakes to outline the entire garden area.
- SPEED SQUARE: This triangle-shaped measuring tool will help you ensure all of your angles are perfectly square.
- MEASURING TAPE: Use a measuring tape to measure once and then twice to ensure proper placement of your raised beds.
- LINE LEVEL: This tool hangs on the string to ensure it's level around the perimeter of your garden area.
- BEAM LEVEL: Look for a level that's as long as possible. Ideally, it should be able to span the walkways between your raised beds.
- LANDSCAPE CHALK: Use landscape chalk or regular ol' spray paint to mark where your raised beds will go.
- SHOVEL: You'll dig up soil from some parts of your garden and move it to other areas to build them up.
Now, let's look at the five steps to install a raised-bed garden on a slope.


Step 1: Measure the Existing Slope
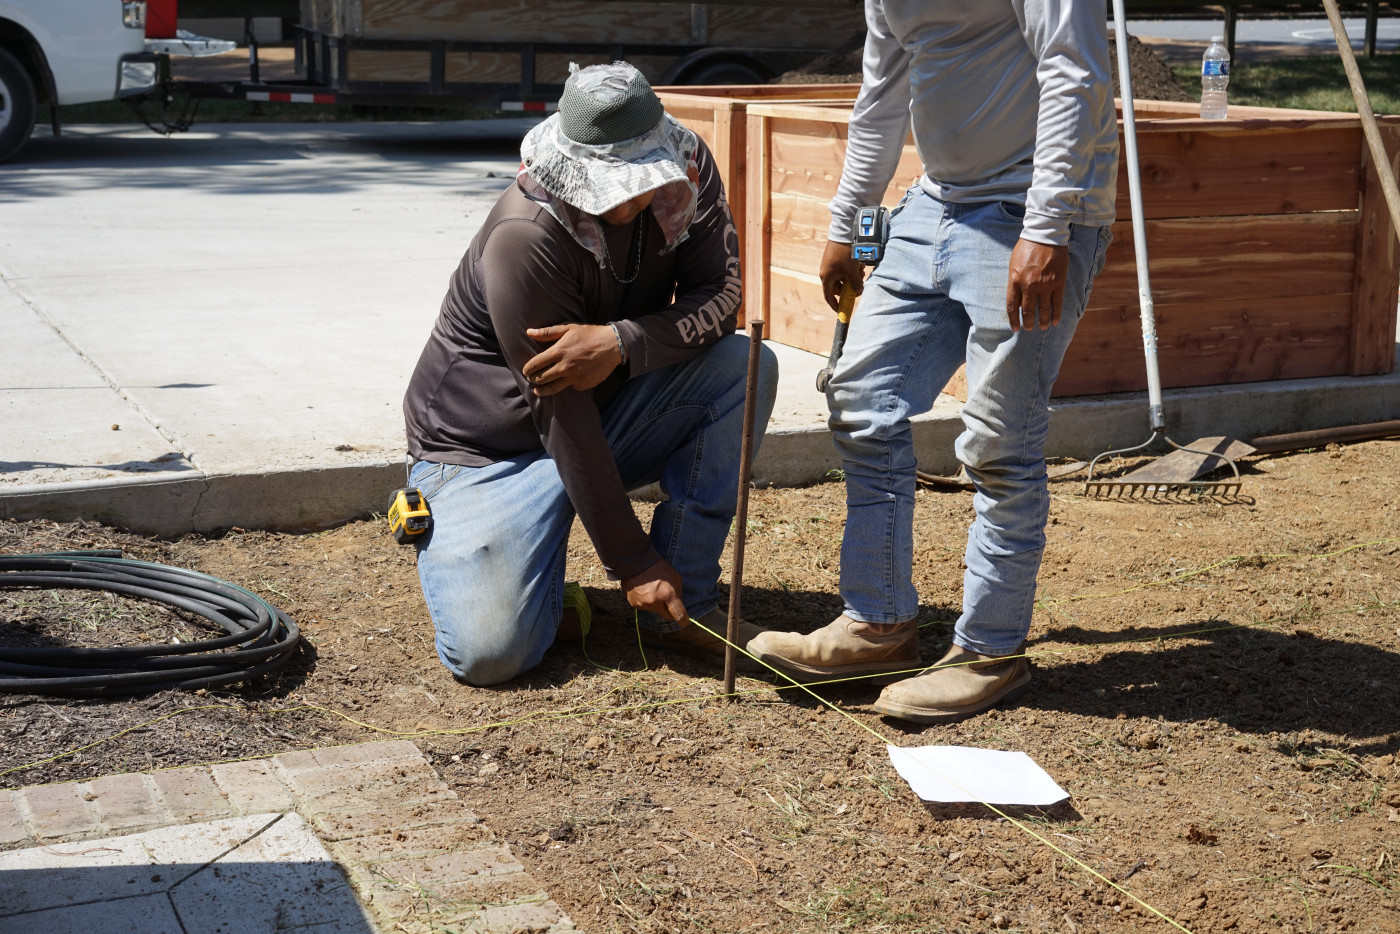
Install your rebar or stakes at the four corners of your cleared garden space. Use your measuring tape to make sure each corner is where it should be.
Wrap the string or twine around the four stakes to create a square along the perimeter of your garden.
Use the line level on every side of the perimeter to ensure the string is level. You'll need to raise the string in some corners and lower it in others. This is essentially creating a level plane that doesn't exist yet in your yard.


Once you've ensured your string is level all around, you're ready to measure the slope of your space. Start at the lowest point of your slope and measure the length from the top of the string to the ground.
Then, move to the highest part of your garden and measure from the top of the string to the ground.
To calculate your slope, all you have to do is take the difference between those two measurements. In other words, subtract the highest point from the lowest point. For example, if the lowest point measure 15 inches from top to bottom, and the highest point measures 3 inches, then you've got a difference of 12 inches.That means you're working with a 12-inch slope.

Step 2: Calculate Change Needed for Each Raised Bed
This next step is to calculate how much you'll need to change the ground underneath your raised beds to be sure they're placed on a level plane. To determine how much you'll need to dig down or build soil up under each bed, simply divide the total change in depth by the number of beds you'll be installing along this slope.
For example, if the slop changes by 12 inches and you'll be installing 2 beds along the slope, you'll divide 12 by 2. Each bed will need to be adjusted by 6 inches. Those beds that will be located on the highest part of the garden will need to drop down about 6 inches, while those that will be located in the lowest part of the garden will need to be built up about 6 inches.
Kitchen Garden Revival
Kitchen Garden Revival is your invitation to ditch the messy, high-maintenance veggie patch and step into a new way of gardening, one that’s elegant, organized, and endlessly rewarding.

Step 3: Level Space Underneath Each Bed
Once you've calculated how much each bed needs to be adjusted, it's time to grab your shovel and start digging. The great news is you only need to adjust the soil beneath the edges of each raised bed. Leveling the entire garden area would mean filling in with loads of soil or gravel—way too much extra work! Instead, it's really only necessary to dig down in the highest part of the garden and build up in the lowest.
Before you dig, use landscaping chalk to mark where each bed is going to be placed. Use your tape measure to double and triple check that everything is spaced evenly apart and equidistant from any features in your landscape, like the edge of a patio.
Then, grab a shovel and dig a little trench under the beds that need to be lowered. Take the soil that you removed from the highest part of the garden and use it to build up the lowest part of the garden.


Step 4: Place the Raised Beds
Now that you've done the hard work of moving all that material around, it's time to get your beds in the right spot. Place your beds where you want them to go. Use your speed square and your measuring tape to ensure you have right angles and that everything is lined up just the way you want it.
This step seems simple, but it usually takes our team a good bit of time to get each bed situated and all lined up. We usually measure the distance from different points of the raised bed to permanent objects like patios. We measure the distance from one raised bed to another. Then we double check all our measurements.


Step 5: Adjust
It's time to put the finishing touches on your bed installation by ensuring your beds are level with one another and adjusting as needed. Place a beam level between each and every bed, front to back and side to side, to see which sides need to move up and which need to move down.


You also want to check the levelness of each raised bed.
By this point, you've already done 85% of the leveling. You're just tweaking sides and edges as needed so that when you look out over your garden, the tops of the raised beds are all level.


Does the Ground Need to Be Level?
The ground around your raised beds does not need to be level. You can walk around on a gentle slope in your garden space. It's really the top of the beds that matter most, not only for aesthetic purposes but also so your soil doesn't wash out of low points of your beds during heavy rain.
If you want to have level ground, I recommend surrounding your entire garden space with edging to create a border. (Learn more about how to install edging.)


Shop Steel Garden Edging
Easily install high-quality, professional-looking edging around your lawn, garden, or landscaping. This edging will last many years, unlike plastic or rubber-based edging material.
This edging is all-in-one. There are no separate stakes or parts to come loose. Each 39" section locks permanently into the next.
Once you've installed some type of edging, cover your pathways with gravel or another kind of ground cover. (Learn more about the best materials to use for kitchen garden pathways.) You'll add more gravel to lower parts of the garden to bring it up.


Now You Have Level Raised Beds
It's time to fill your raised beds with soil, set up irrigation, and bring in the plants (the best part!).
For more garden installation tips, check out our How to Start a Garden series.
Don't Miss a Step to Start Your Garden the Right Way!


Join the 2026 Gardening Workshop

