

Nothing Beats Harvesting Homegrown Veggies from the Garden
You've never really tasted something until you eat it fresh from the garden. That's one of the main benefits of having your own vegetable garden. You get to enjoy plants when they're at peak flavor and nutrition, fresh from the garden.
That cherry tomato you pluck from the vine? It'll be bursting with flavor because you literally just harvested it. A tomato from the grocery store sat on a truck, traveled across the country, and then waited on a shelf for weeks, so it’s not going to taste nearly as good.
Those tender lettuce leaves you cut this morning? They'll be so sweet and delicious you won't even need dressing!
Harvesting your own produce means you can experience flavor and nutrition than money just can't buy at the store.
Let's look at some general guidelines and then how to harvest different types of plants.


Vegetable Harvest Guidelines
Keep these guidelines in mind as you head out to the garden to harvest.
Harvest in the Morning
In general, the very best time to harvest from your vegetable garden is early in the day. Your plants have rested through the night and will contain the most sugars inside. This is why produce picked in the morning is the sweetest. Right after the sun burns off the morning dew is a great time to pull things from the garden.
Avoid Harvesting from Wet Plants
Speaking of dew, try not to harvest things when they’re wet because it increases the likelihood that there might be mold or mildew on your plants. It can also shorten the storage time of your produce. Let leaves and fruits completely dry off before harvesting. That means not harvesting right after a big rain, if you can avoid it.


Take Only What You Can Use
To enjoy the most flavor and nutrients, it's best to limit what you harvest to what you can use that day or the next. Then harvest again the next morning. The exception to this would be if it's the end of the season and you need to gather everything before the weather shifts.
Harvest Fruits & Veggies on the Smaller Side
Most of the fruits and vegetables you'll be growing should be harvested when they're a little bit smaller than their grocery store counterparts. The varieties from the store are often bred to be larger, in addition to holding up better to travel. Your harvests will be sweeter, fresher, and crisper if you harvest them when they're a little bit smaller than what you would think is normal. So pick things when they look ripe and ready instead of judging them on their size.
Clean Your Pruners or Scissors
Before your head out with your pruners, make sure they’re clean. Give them a good rub down with a little bit of rubbing alcohol to avoid transferring disease or anything gross to your plants while harvesting.


My Favorite Harvesting Tools & Supplies
Harvest Basket
Look for a flatter basket with small holes to let dirt shake through. (I rounded up my favorite harvest basket options.)
Strainer/Colander
It's great to have something with holes in it so that you can rinse off your harvest before you bring it inside. If you have a salad spinner, you could just take the little basket outside with you to make it even easier to wash your fresh greens.
Jar of Water
Leaves and flowers that wilt quickly should be placed in water immediately after harvest.
Pruners & Scissors
Needle-nose pruners, herb scissors, and harvest scissors are must-haves.
Twine/String
Tie up harvests that need to be hung to dry as you're harvesting. That way, you don't make a mess with leaves or seed heads inside your house.
Hori Hori or Sharp Knife
I don't recommend pulling an entire plant out of the soil. It's super messy, and it can disturb not only the roots of nearby plants but also the beneficial processes happening in the soil. If you need to remove an entire plant from the space or harvest a large vegetable like cabbage, use a hori hori or a sharp knife with a serrated edge to cut the plant at the base.
Harvesting Guides
How to Harvest Herbs
If you start herbs from seed, you'll need to wait 30 to 45 days before you take your first leaf harvest. If you bring home plants from the nursery, you can start cutting small harvests almost immediately. Wait a month or two before you begin taking more leaves.
Once they're established, you can—and should—harvest from your herbs at least once a week. Herbs are prolific producers; in fact, the more leaves you cut from them, the more they give you!
In general, you'll harvest herbs by starting from the outermost branches and working your way in. Follow the golden rule of harvesting and never cut more than a third of a plant within a given week. That way, it can continue photosynthesizing and making food.
Now, let's look at how to harvest annual and perennial herbs.


How to Harvest Annual Herbs
Annual herbs are so soft you can simply pinch the stems with your fingers. You can begin harvesting them once they're about 6 or so inches tall.
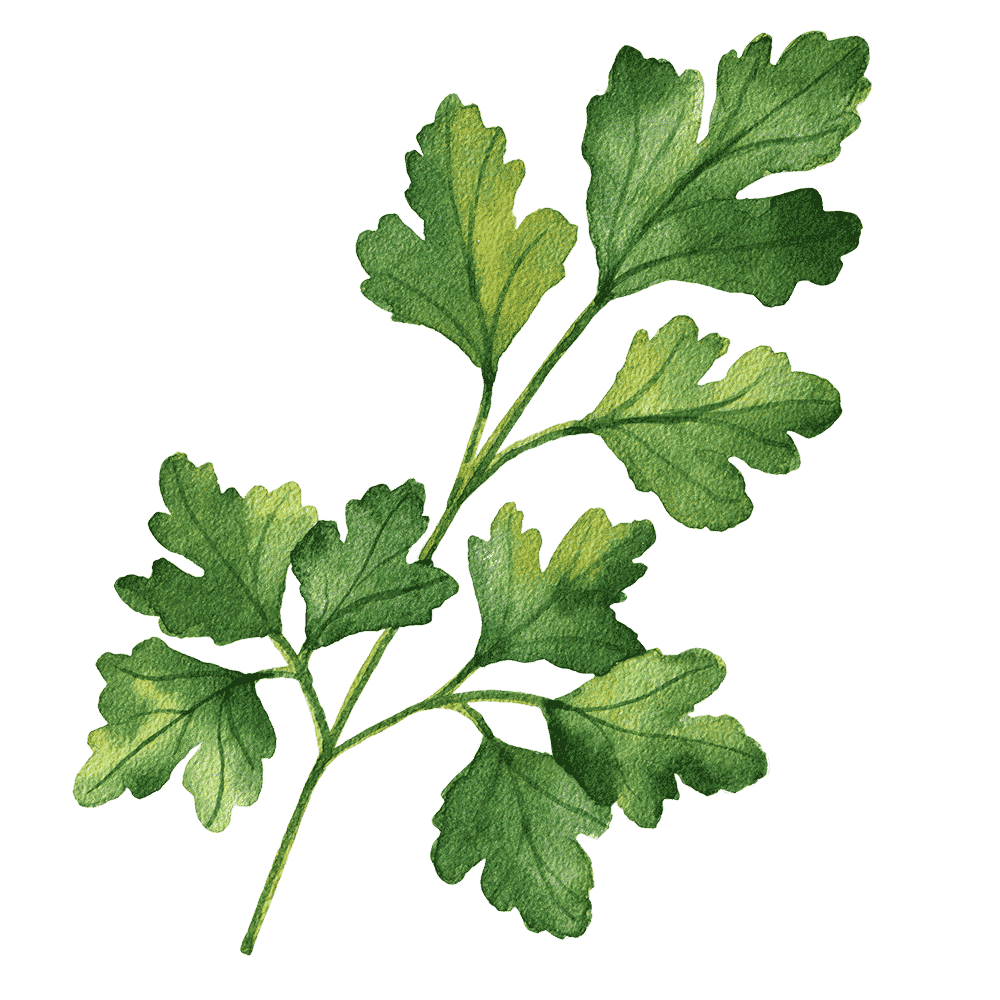
For annual herbs like cilantro and dill, cut from the outside of the plant, all the way down at the bottom of the stem, and leave the smallest leaves at the center to keep growing. Even though parsley is technically a biennial, it should be harvested the same way. These three herbs should be put in a jar of water immediately to keep them fresh.
You'll harvest your basil a little differently than cilantro and dill. You want your basil to grow more like a bush instead of sending up a lot of tall spikes that are inclined to start flowering. Avoid cutting near the base of the plant. Instead, focus on the top of the plant and encourage each branch to fork into two new branches by cutting right above a leaf node.
If you notice your annual herbs are sending up tall center stalks, they're likely bolting, or going to seed, due to a change in the temperature. Cut off the stems that are growing too tall so that you can enjoy leaf harvests just a little bit longer.
Annual herbs are often best when enjoyed as fresh as possible.


How to Harvest Perennial Herbs
Perennial herbs like sage, rosemary, mint, thyme, and oregano can be harvested once they have several stems. You can use your fingers to pick individual leaves, but the best way to harvest them is by cutting just above a leaf node. This encourages them to keep growing and branch out more.
For herbs that spread wide like mint, thyme, and oregano, you can also reach underneath and cut long stems all the way to the base of the plant to thin them out a little. This is how you can encourage these herbs to cascade over the side of a raised bed or container instead of spreading into the interior.
Perennial herbs can be enjoyed fresh or dried for later use. To dry herbs, strip the bottom leaves from each stem and tie a small bunch together with twine or wire. Hang each bunch upside down somewhere dry and away from direct sunlight. You want the leaves to be so dry that they're brittle to avoid mold or mildew once you store them. Strip dried leaves into a glass jar. Now you have dried homegrown herbs to last all winter long.
Chives are the odd herb out. You can begin to cut from chives once the leaves are at least 3 to 4 inches long. To harvest chives, gather several stems in one hand and cut them pretty low, about 1 to 2 inches above the soil level. New growth will spring from the center of the plant, not the tips.


How to Harvest Leafy Greens
Most greens are so soft you can use your fingers to pinch off leaves.
Like herbs, leafy greens are what we call cut-and-come-again plants. The name's pretty self explanatory, but basically, you can get harvest after harvest from these plants over the next few weeks or perhaps months (even years in the case of kale and Swiss chard). These plants grow from the center outward, so if you cut the older, outer leaves, the plants regrow from the middle.
Regular harvesting is one of the best ways to keep your leafy greens healthy and productive. Harvesting is even more fun when it counts as taking care your plants, right?
Leaves, Roots & Fruit Teaches You the Step by Step to Grow as a Gardener
Do you dream of walking through your own kitchen garden with baskets full of delicious food you grew yourself?
Nicole Johnsey Burke—founder of Gardenary, Inc., and author of Kitchen Garden Revival—is your expert guide for growing your own fresh, organic food every day of the year, no matter where you grow. More than just providing the how-to, she gives you the know-how for a more practical and intuitive gardening system.
How to Harvest Small Leafy Greens
Small leafy greens like lettuce, arugula, and spinach are ready to harvest within 30 to 45 days. There are a few different ways to harvest the leaves.
The first method is to go around the outside of the plant and remove the older, larger leaves one at a time. All lettuces can be harvested this way, even those you're growing to form a head, like iceberg, buttercrunch, and romaine. This is the best method for younger plants if you're looking for smaller leaves.
The next method is what I call the ponytail chop. This is the best method for a bed that's packed with lettuce plants (or for when you're short on time). Grab leaves in your hand like you're gathering hair for a ponytail and then cut directly across beneath your hand. There are typically small leaves left at the base of the plants that will continue growing, but some plants won't recover after being harvested this way.
The last way to harvest is by cutting the entire head of lettuce. Go to the base of the plant and cut right above soil level. This is the best way to harvest near the end of the growing season when it's time for these plants to come out of the garden.


How to Harvest Large Leafy Greens
Large leafy greens like Swiss chard, collard greens, and kale are biennials that can last in the garden for a long time, so you don't want to cut the whole thing off. You want to encourage them to produce for as long as weather allows. That means mostly harvesting from the older, outer leaves of these plants, leaving the center to keep on growing. (You can also harvest cabbage plants this way, even while you're waiting on the head to form.)
You can occasionally harvest from the younger leaves in the center if you're after softer, sweeter leaves that will be eaten raw. Only take a few center leaves from each plant. Larger, older leaves are great for cooking and will become more tender with heat. If you'd like to harvest leaves for a salad or smoothie daily, I recommend having several plants of each variety.
Use pruners to cut stems close to the base of the plant, or grab a leaf and twist gently to break it off.
The only time you'd want to cut the base of these larger plants is when it's time to remove them from the garden space. To harvest cabbage, use a sharp knife, a hori hori, or large pruners to cut right at the base.


How to Harvest Root Crops
Pulling up root crops like radishes, beets, and carrots is the ultimate moment of truth! You'll have waited anywhere from 30 to 90 days to know if anything's even been growing under the soil.
To know when it's time to harvest, you can first pay attention to the greens growing above ground. If there's not a lot of leafy growth up top, the root is probably not developed yet.
Once the greens look nice and full, then it's time to check the shoulders of the root. Root crops will often show you their shoulders—the part where the taproot meets the leafy greens—when they're ready. If the shoulders aren't peeking up at you (or bursting out of the soil), then you can use your finger to swipe gently around the base of the plant to check on root development. There's no way to know how long the root will be until you pull the whole thing up, but at least you can gauge the width. Remember that your root crops are best harvested before they reach the size of grocery store produce.


The day before you harvest root crops, water the soil so that it'll be nice and moist when you pull the roots. Harvest root crops one at a time by giving their leaves a gentle tug. In my enthusiasm, I've sometimes pulled too forcefully and ended up breaking the stems. For larger roots like beets, you might want to loosen the soil a bit around the top before tugging.
After you've harvested one or two, examine the size of the taproot. If they're not the size you'd like, leave the rest to keep on growing a little longer.
Shake your roots off, take them inside, give them a good rinse, and store them in a cool place immediately.
Don't forget that one of the beautiful things about root crops is that you can eat the leaves in addition to the root. Carrots, beets, and radishes all have edible leaves, but you often don't get to eat that part when you buy all your produce from the grocery store.

How to Harvest Tubers & Bulbs
Onions, garlic, and potatoes give you clear signs they're ready to harvest. For the most part, you'll look for the leaves to turn brown. This indicates the plant has reached maturity and has put all its efforts into growing the parts underground instead of the leaves.
Most potato varieties take upwards of 70 days to mature. Watch for the leaves of your potato plants to start turning yellow. This is a good indication it's almost harvest time. Stop watering your plants to give each tuber time to toughen up a little underground. Once all the foliage has died back, use a pitchfork or large shovel to dig around the area and loosen the soil. Use your garden tool to help you pull all the roots up together. Be very careful not to cut into a potato; handle them gently. Damaged potatoes cannot be stored.
Bulbs need to spend months in the garden before they're ready. Onions need about 80 days from being planted by sets. Garlic is often planted in the fall for a harvest about nine months later. Garlic is ready when the bottom two to four leaves have started to turn color. Again, use a small shovel or a hori hori to loosen the soil a little before you pull your bulbs up.
If you don't get the full garlic or onion bulb that you were after, you can still use the greens.
I really don’t think there’s anything more magical than planting a seed or a small piece of a plant, leaving it alone for months, and then pulling a huge onion bulb or potato out of the ground.


How to Harvest Fruiting Plants
Fruiting plants typically take at least 60 to 70 days to get to the fruiting stage, and by that time, you may only have 30 more days to enjoy production until the weather changes. Once temperatures are no longer ideal, fruit production will decrease and slow down. With this in mind, you want to get as many fruits from each plant as possible during your optimal growing window.
The best way for us to maximize fruit production is to harvest early and often. When I say harvest early, I mean as soon as the fruits show signs of being ripe. And then keep those plants picked. For ambitious fruiting plants like okra, you might need to harvest nearly every single day during the peak of production.
Don't leave fruits on the plant too long. Not only will you miss the fruit at its peak, you'll also send the message to your plants to slow down production.
It's typically best to use pruners or sharp scissors to harvest fruit. Pulling things with your hands risks ripping off entire stems—which is so sad because that means no more tomatoes or peas from that stem!


Most of your fruiting plants—indeterminate tomatoes, eggplant, cucumbers, vining beans, and peas—can be harvested weekly once they're producing.
For vining tomatoes, if only one fruit on a truss has ripened, you can lightly pull that fruit from the vine with your fingers and leave the rest for another day. If the entire truss is ready, you can cut it where it meets the stem with your pruners.
For plants like peppers, squash, and melons, use pruners to cut the stem right above the fruit. Use pruners to harvest each little pea or bean pod separately.
Here's to harvesting as many fruits as possible until your plants come to the end of their life cycles or the season changes!


How to Harvest Broccoli, Cauliflower, & Celery
For broccoli and cauliflower, the part you're harvesting is an unopened flower head. Use a sharp knife or hori hori to cut the base of the floret. For broccoli, leave the main plant to keep growing; you may get some side shoots if weather conditions remain optimal.
For celery, wait until the stalks are 6 inches tall, and then begin harvesting from the outside. Use pruners to cut the stalks near the base. Harvest as many stalks as possible before the temperatures rise and celery becomes stringy. You can also harvest celery leaves throughout the season.


After Harvesting
How to Store Your Harvests
Be aware that most vegetable and fruit varieties you'll grow at home do not store well. In fact, you might be surprised at how fast things change color or texture and lose flavor. Your plants were made to eat fresh, so enjoy them as quickly as you can.
Keep Warm Season Fruits at Room Temperature
Tomatoes and many other fruits do not do well in the fridge. Think about the environment these plants love when they're growing. Plants that prefer hot weather (okra, eggplant) and those that prefer warm weather (tomatoes, peppers) will actually do best left on the counter inside rather than going into the fridge.
Keep Cool Season Crops in the Fridge
Cool season produce like lettuce, carrots, and radishes generally will preserve better if kept in cooler temperatures. Wash your harvest, dry thoroughly, wrap tightly, and store in a drawer inside your fridge.
For root crops, trim off the greens before storing. If your roots look limp, try soaking them in cold water to revive them.
Dry Perennial Herbs
Treat herbs like basil and mint as you would fresh-cut flowers: put them in some water and leave them out to enjoy. The other herbs can be kept wrapped in a paper towel inside a baggie in the fridge. They should last this way for a week or two.
It's super easy to dry and save perennial herbs from your garden so that you have a year-round supply. Hanging these herbs to dry or using a dehydrator retains all their distinct, delicious flavor.


Make the Most of Every Garden Harvest!
Hopefully you feel like a harvesting pro by now. When in doubt, don't be nervous to pull something and do a little taste test. There’s no harm in digging up some potatoes or pulling a few carrots early to see if it’s time to harvest. In general, all the leaves you're growing are ready to harvest as soon as they form. It's just a matter of making sure they’re the right size for your needs. With fruiting plants and root crops, of course, there's a bit more to the timing. If you miss an optimal harvest window, it's okay. We don’t make mistakes here; we only learn lessons.
Don't forget to take tons of pictures and videos of your harvests to document your progress and successes along the way. You're going to be astounded by all the things you get to pull when you harvest early, often, and small.
Here's wishing you many harvest baskets filled with delicious things grown in your garden for years and years to come!

Learn How to Plant the Gardenary Way

