

Seed Starting Indoors Made Simple
Starting your own plants indoors is kind of like a gardening cheat code: If you do it right, you have healthy seedlings ready to grow in the garden as soon as the season starts. You can grow varieties you may not find in stores and avoid all that plastic waste that comes from buying plants. You can also save a ton of money! Plus, if you're like me and just can't wait until spring, then starting seeds will give you something proactive to do during those last days of winter.
If you're a total beginner to seed starting, it can feel a little complicated, maybe even overwhelming. There is some setup involved before you can even get started, yes, and then you'll need to get the timing right. I started my own plants indoors for several years without much success until I settled on the 5-step process I'll teach you below. And once I got it right, I took my garden to the next level.
Consider this your guide to everything you need to know to start your own seeds indoors this season.
What is Indoor Seed Starting?
Indoor seed starting is the process of planting and growing seedlings indoors using trays and a growing medium. The basic concept is the same as sowing seeds outdoors: you need water, light, and the right soil temperature in order for these seeds to turn into plants. The difference is it's on you to provide these things, instead of Mother Nature.

Is Starting Seeds Indoors Worth It?
Before we get started, here are the pros and cons so you can decide for yourself if taking this step is worth it for you.
Pros
- Get a head start on the growing season by mimicking optimal soil conditions and temperature for the plants you want to grow.
- Grow a wider variety of plants than what you're likely to find at your local nursery.
- Push the boundaries and grow a plant that normally wouldn't do well in your climate.
- End up with dozens of plants for the cost of one seed packet (or the same price you'd pay for one starter plant at the store).
- Give your plants a great start without synthetic fertilizers or pesticides, which are often sprayed in plant nurseries.
- Reduce your plastic waste.
Cons
- Invest in initial setup to mimic the outdoors inside your home.
- Spend about 10 minutes a day checking on your seedlings and tending to their needs.
- Commit to caring for these plants for the next 45 to 60 days before they move outdoors (not a great activity to do before leaving town for 2 weeks).
- Troubleshoot any issues that arise.
My Take
If you're super busy or just not looking to tackle a new challenge, it may not be the right time to give seed starting a try (and that's totally okay!). Don't put unnecessary pressure on yourself by thinking you have to grow all your own plants from seed. If you need to buy some plant starts, that's a great way to support your local nursery and growers.
Those of you with smaller garden spaces may also opt for buying plants (or direct sowing). It's not really worth busting out all the supplies to end up with a couple tomato plants for your garden. Save your time and energy for another gardening task.
You may see gardeners online with huge seed starting setups. While you can go all out, you can also buy supplies that allow you to start a tray or two of seeds in the smallest of spaces in your home—a little corner, a tabletop, even a closet.
And lastly, seed starting can be a little tricky. It might take you a couple of seasons to get the hang of it. Even so, f you want to start more than a dozen plants for your garden each season, then I think it's totally worth the effort.
All right, let’s look at the supplies you'll need to start seeds indoors.


Recommended Seed Starting Supplies
The first time I ever started seeds indoors, I just used a plastic salad box with some holes poked in the bottom. You can always start with budget-friendly options and repurposed items, and then upgrade your setup later. Here's what you'll need:
- ORGANIC SEED STARTING MIX. You'll need seed starting mix, not regular potting soil. You can purchase mixes that are ready to go or you can make your own. My favorite option are these coco coir bricks. Find all of our recommended seed starting mixes and a recipe to make your own HERE.
- EARTHWORM CASTINGS. Grab some earthworm castings from a reputable provider (or use your own) to feed your growing seedlings.
- SEED STARTING TRAY. There are lots of different options available, and materials include plastic, steel, and biodegradable wood fiber. You can buy anything from 6-cell seed starting trays to 72-cell plug flats. You can skip the tray and make your own soil blocks. If you're using any type of container, just make sure there are holes in the bottom for drainage. Find our recommended seed starting trays HERE. Note: Make sure to wash your seed starting trays well in between uses.
- A NON-DRAINING TRAY. You'll need something that holds water to go underneath your seed starting tray or soil blocks. Many non-draining trays can be purchased in large sets. More on trays HERE.
- COVER. If you buy a seed starting kit, it'll probably come with a dome to help keep moisture inside while the seeds germinate. If you don't have a plastic dome, you can use burlap or a wet kitchen cloth to drape over your trays.
- LIGHTING. I highly recommend using a grow light for seedlings instead of relying on natural light. Seedlings grown in a windowsill tend to be leggy or lean over too much because they're not getting enough sunlight. Look for a full-spectrum light, preferably one with a timer. You can go as simple as wand lights that can be raised and lowered over your trays, or suspend hanging lights over a shelving unit. Find our recommended light options HERE.
- SEEDS. Seed quality matters. Look for organically sourced, non-GMO seeds, and when possible, shop local. (Check out the plants I recommend starting indoors below.) You can shop our premium Gardenary seeds HERE.
- HEAT MAT. Seeds for plants that grow in the warm and hot seasons (think: tomatoes, peppers, okra, etc.) germinate best in warmer temperatures. A heat mat sits like a warm blanket under your seed starting tray.
- PITCHER. I recommend filling a large pitcher with tap water and letting it sit at room temperature. You'll use this pitcher to bottom-water your seedlings (more on that later!). You might also want to have a little spray bottle to mist your trays.
- OTHER. Grab a large bowl or tray to use when rehydrating your seed starting mix. You may also want to wear gloves. I recommend using a marker plus plant tags, popsicle sticks, or painter's tape to label your trays with the types of seeds you're starting (a lot of seedlings look alike when they first sprout). Lastly, you may want to aim a small fan at your seedling trays to mimic wind and prevent mildew issues.
Don't be overwhelmed by the supply list. Like every project or hobby, there are some upfront costs to getting all set up. Remember, you can start simply and add nicer supplies as you go. Also, if you plan to start a lot of seeds indoors over the next couple of growing seasons, the money you'll save on plant starts will add up!
What about seed starting kits?
Instead of buying these supplies separately, it may be worth it to grab a kit. Most kits come with seed starting trays, drip trays, humidity domes, heat mats, and LED grow lights.

Which Seeds to Start Indoors
Now that you’ve got your supplies ready, you’ll need to prioritize those seeds that should begin their life cycle inside. Not all plants need to be started indoors. (These plants should be direct sown in the garden.) Focus on plants that take a long time to reach maturity (more than 65 days). Your goal is to give these plants a head start in the garden by maximizing their growing time once they’re moved outdoors.
This is especially important if you live in a climate that doesn't quite fit the needs of the plant you want to grow. A luffa gourd, for example, needs about 120 days in the garden to produce its long fruit. If you live further north, you probably don’t have 120 days between your two frost dates.
If luffa gourds are high on your grow list, then you can start seeds indoors, grow the plants as far to maturity as you can, and then, as soon as the temperature is ideal, move the plants out to the garden. This method allows you to maximize the time the adult plant can spend growing outside in its ideal climate and (fingers crossed) increases your odds of actually getting a full luffa gourd to grow in a cooler climate.
Cool Season Plants to Start Indoors
- Broccoli
- Brussels sprouts
- Cabbage
- Cauliflower
- Celery
- Chives
- Kale
- Leeks
- Onions
- Peas
- Swiss chard
Warm Season Plants to Start Indoors
- Basil
- Eggplant
- Gourds
- Melons
- Mint
- Okra
- Oregano
- Peppers
- Pumpkins
- Rosemary
- Sage
- Thyme
- Tomatoes
Once you’ve got your plant priorities in mind, the next step is to make sure you’re starting them at the right time.
When to Start Your Plants Indoors
Timing is important for seed starting. You want to start early enough that you'll have decent-size plants ready to go out to the garden as soon as the weather is right. But you don't want to start too early, or your plants might outgrow their cells and become root-bound.
The right time to start seeds for each growing season depends on your unique climate. You’ll have to adjust the timing based on your frost dates. Here's the seed starting schedule I follow for my kitchen garden:
120 Days Before Last Frost Date
Start slow-growing onions and leeks as early as 120 days before your last frost for spring planting.
100 Days Before Last Frost Date
Start all other large cool season plants about 100 days before your last frost date for spring planting. Move cool season plants outdoors 50 to 60 days before your last frost date—basically as soon as the soil can be worked. These plants can handle frost.
45 Days Before Last Frost Date
Begin starting large warm season plants indoors about 45 days before your anticipated last frost. Only move these plants outside once the threat of frost has passed.
45 Days Before First Frost Date
Start large cool season plants 45 days before your first frost date for fall planting.
Basically, count backward 45 days from the beginning of each growing season and mark your calendars so you don't miss your chance to give your plants a jumpstart. Download our free garden calendar to learn more about when to plant your plant priorities in your vegetable garden. Find more information on timing your seed starting HERE.


How to Start Your Seeds Indoors in 5 Easy Steps
It’s time to start planting your seeds using my very simple, 5-step process. I generally set aside an afternoon or an early weekend morning when I can get a bunch of trays planted at once.
Step 1: Prepare Your Mix
Whether you're using a seed starting mix or a coco coir brick, you'll notice the medium is very dry. So, your first step is to rehydrate and expand your mix by adding water.
In a large mixing bowl, combine one part water for every one part of your mix. The ideal consistency is a mixture that holds together without dripping when you scoop up a handful and squeeze it between your fingers. Ideally, you'll let your mix rehydrate for a couple of hours before planting your seeds. Watch me rehydrate seed starting mix in the video below.
Pro Tip:
I used to start my seeds in just coco coir, but I found that my seedlings started struggling from lack of nutrients after a couple of weeks. I started working in just a little bit of earthworm castings, and my seedlings now look much healthier. I recommend mixing in earthworm castings at a ratio of 3 parts seed starting mix to 1 part castings.


Step 2: Fill Each Growing Cell
Evenly distribute your moistened seed starting mix into each cell that you’re going to plant. Fill the cells to just below the top, and then use your fingers to lightly pack down the soil in each cell.
Step 3: Sow Your Seeds
Use a dibber, the eraser end of a pencil, a chopstick, or the tip of your finger to make a small indentation in the middle of each growing cell, exactly where you want each seed to go. (Reference your seed packet to know the correct planting depth.) Some seeds are so small that they’re hard to see once they’re put in the soil. Do your best to grab just one seed at a time and place it in an indentation. (My trick is to lick my index finger.) Even if the seed package directs you to plant two or three seeds per hole, I recommend sticking with one seed unless you intend to thin (or remove the extra seedlings) later. If nothing sprouts in a cell, you can always try again with a new seed.
If you plan to start seeds from the same plant family, consider growing them together in the same tray. For example, you could plant a row of kale, a row of cabbage, then kohlrabi, mustard greens, collards, and broccoli. Their germination times will be similar, and you’ll reduce the temptation to sow 60 cabbage seeds at once.
Once you’ve placed your seeds in the indentations, make sure to mark where you’re planting each type of seed. Use planting tags, popsicle sticks, or painter’s tape stuck to the sides of the tray.
Lightly cover your cells with a thin layer of moistened seed starting mix.


Step 4: Water
Fill the bottom of your non-draining tray with water and then place your draining tray or your growing cells inside. You don’t need to add a lot of water because your seed starting mix is already damp. Your seeds will, however, soon begin wicking all of the water from the mix. For those first few days after you've sown seeds, it's critical you don't let the medium dry out. Seeds need to feel a lot of moisture around them to germinate.
This is how you will water your seeds: not from above, which might disturb the newly planted seeds, but from below.
In order to lock in the moisture while your seeds germinate, you can cover your trays with a dome, a piece of burlap, or a dish cloth. Most seeds do not need light to start growing, just water and the right temperature.
Speaking of temperature, this is the stage where some gardeners use a heat mat under their trays. You don’t need a heat mat for plants you’re starting for the cool season (unless your house is like 20°F), but some warm and hot season plants can benefit from one.


Step 5: Turn Your Grow Lights On and Off
Many seeds don't require any light at all to sprout. Even so, I skip the humidity dome and begin turning my grow lights on and off from the first day that I plant my seeds. You might consider doing the same. Otherwise, be ready to aim light on your trays at the very first sign of green emerging from soil.
You want your seedlings to receive light as soon as possible and as close as possible. Lower your lights to be just a couple of inches above your trays.
Your lights should be on for 12 to 14 hours a day. That may sound like a long time, but time under artificial lights is not the same as actual time under the sun.
Get in the habit of turning your lights on when you wake up and turning them off before you go to sleep.


Seedling Care
Until your seedlings sprout, it's really just a waiting game. Make sure to check on your trays each day and tend as needed.
Water
Monitor your trays to ensure the growing medium stays slightly damp at all times. (One of the reasons I love coco coir is the color lightens when it's dry, making it really easy to tell when you need to add water.)
When it comes to sprouting seeds, drying out is basically equivalent to dying out. But you also don't want the medium to stay so soaked that your seeds rot. Continue adding an inch or so of water to the bottom of your tray as needed so that the growing medium will absorb water. You can also use a spray bottle to keep corners moist.
Make sure to remove the humidity dome once your seeds start sprouting.
Provide Light
Turn the lights on for about 12 to 14 hours a day. Grow lights that come with built-in timers are great for consistency. All you have to do is set your timer to click on every morning and off every evening, and then check to make sure the timer is working. If you don’t have a timer on your lights, you can add one, set yourself phone reminders to turn the lights on and off, or work the lights into your daily routine.
In the days after sowing your seeds, you’ll keep the light source right above your trays. As your seeds germinate and your seedlings start to grow, you’ll slowly lift the lights so that they're about 2 inches above your seedlings.
Your light setup may not fully cover every single leaf on your tray. If that’s the case, rotate your trays every day so that you can get even light on your plants throughout the week. In some cases, you may need to shine 2 lights onto one tray.


Add Nutrients
Seed starting mix is largely empty of nutrients. That's why I started adding earthworm castings to my mix. Your plants won't really need extra nutrients until they’ve produced their first true leaves (the second set of leaves, which resemble the leaf shape of the mature plant).
If you didn't add worm castings at the time of planting or if you feel like your seedlings need extra nutrients, there are a couple easy ways to feed them.
- The simplest is to add a little bit of compost to the top of your seed starting mix, right around the base of each seedling as they’re starting to grow.
- You can always add earthworm castings now by sprinkling them over the soil surface.
- If you're growing sprouts, save the water your seeds were soaked in. It's full of nitrogen and other nutrients. Just pour your sprout water into the bottom of your non-draining seed trays.
Repeat every 2 weeks. But be careful—there’s such a thing as overfeeding your seedlings. Avoid adding synthetic fertilizers, which can burn your seedlings. (Burning basically means overstimulating, or giving too much of certain kinds of nutrients to a plant.)
Grab Your 2025 Garden Planner
Make 2025 your best year in the garden yet with this downloadable garden planner.

Monitor Temperature
Each plant has a certain temperature range that it likes to grow in. You want to mimic your plants’ ideal growing season. Cool season plants like cabbage do best in spaces kept no warmer than 65 or 70°F. Warm season plants like tomatoes, on the other hand, prefer temps between 65 and 85°F. For this reason, some growers use heat mats when they’re starting these warm season plants indoors.
I only use heat mats to get my tomatoes, peppers, and eggplants to germinate. As soon as your seedlings germinate, remove the heat mat.
Replant As Needed
Seeds operate on a different time table, depending on the type you're growing. Even among the same variety of seed, planted in the same growing medium, in the exact same tray, you may get uneven germination. I typically go back and sow more seeds in cells that are stubbornly remaining empty once the allotted time to germination on the back of the seed package has passed.
Thin
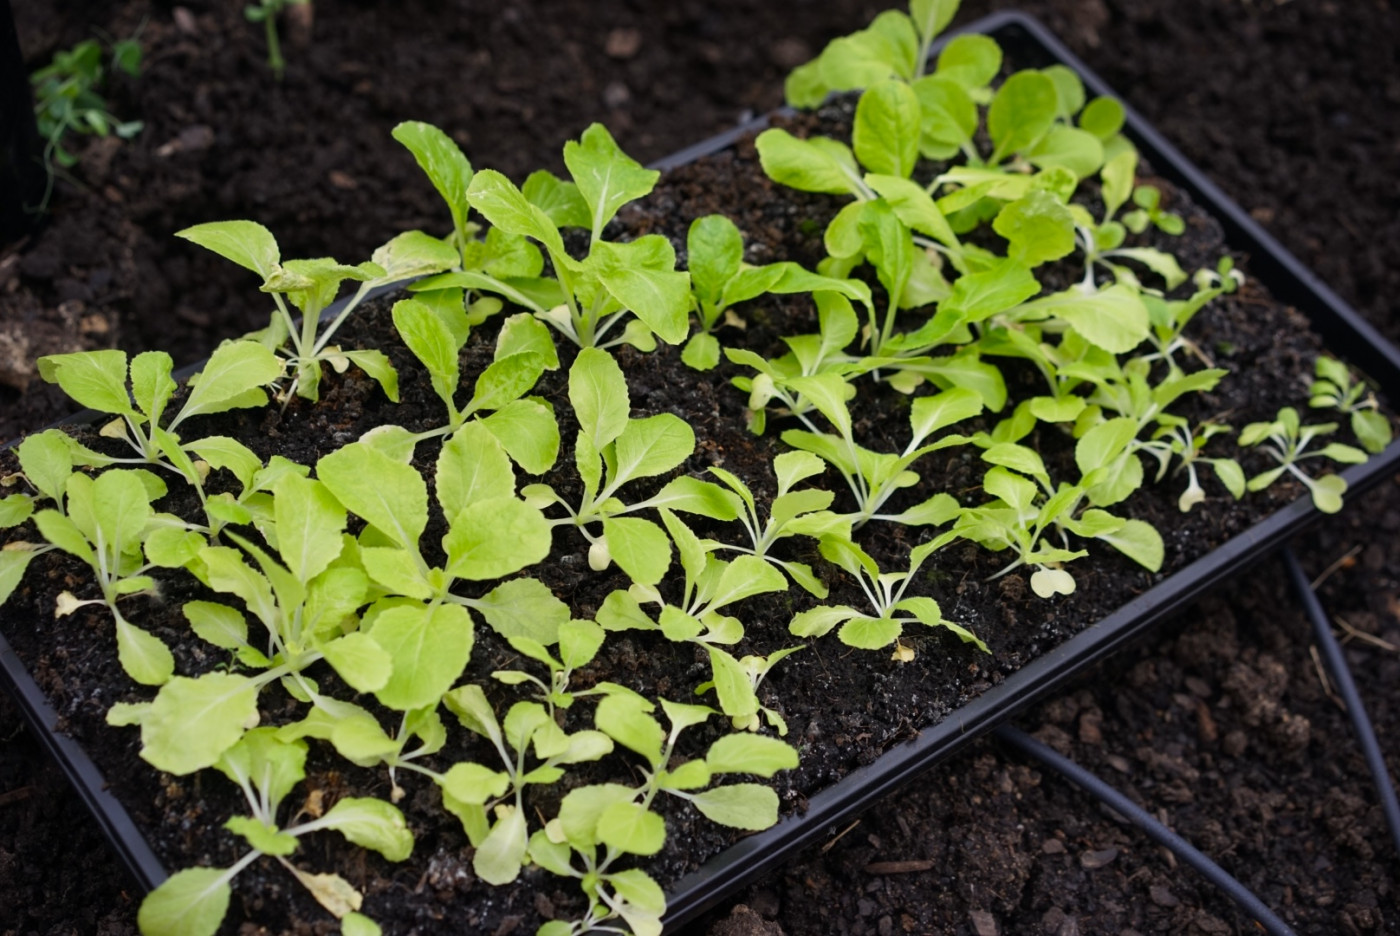
If more than one sprout has popped up per cell (as has happened in the picture below), you may want to thin them once they've developed their first true leaves. Thinning plants always makes me feel guilty, but we do it to give the remaining seedling the space it needs to grow and thrive. To thin seedlings, use a pair of scissors to cut all but one sprout just above the soil line.


How to Troubleshoot Seed Starting Issues
Even after years of starting seeds, I inevitably have something go wrong every season. Whenever I experience some kind of frustration with starting seeds, it typically comes down to one of the problems below:
Problems with Light
Your seedlings will let you know if you’re not quite getting the lighting situation correct. If you notice your seedlings getting leggy (growing a tall stem without many leaves), they’re not receiving enough light close to them. Slow growth can also be attributed to not having enough light. To solve this issue, either increase the duration that your grow lights are turned on or move your lights closer to the seedlings.
If, on the other hand, your light is too close to the seedlings, you’ll notice the leaves look burnt or discolored. I’ve had leaves turn almost white when the light was too strong or too close. Try moving the light source further away from the leaves.
Problems with Airflow
If mold is forming or if your seedlings are dying, the cause is likely bad airflow. If the soil is too dense and holds too much water, or if there’s too much moisture in the air and not enough air circulation around the plants, your seedlings can develop something called damping off, a disease caused by fungus and mold where the plant dies shortly after germination.
Good airflow is needed not just to prevent mold and fungus, but also to strengthen your plants. Wind and storms outside force plants to develop stronger roots and stems. If your seedlings are leaning, falling over, or looking frail, there could be a lack of airflow in the room where they're growing.
Remedy bad airflow by angling a small fan toward your seedling trays and turning it on the lowest setting. You can also simulate wind by rubbing your hand over the top of your seedlings each day when you check on them.
Problems with Temperature
If your seedlings are growing at a very slow pace or appear stalled, that could be a sign that your plants are not warm enough. Adjust the thermostat to make the temperature in the room warmer.
Curling leaves or general signs of stress could mean that the plants are too hot. As soon as your plants germinate, remove the heat mat and make sure the temperature in the room is not way above the ideal range for the plant you’re trying to grow.


Problems with Nutrients
If the leaves of your seedlings are yellowing or turning a strange color, that could be a sign that there's not enough nutrients in the soil. Most likely, the soil needs more nitrogen. If your seedlings stop growing after they’ve developed their first true leaves, that’s also a sign that there’s not enough nutrients in the soil to push them to their next stage of growth.
On the opposite spectrum, if the leaves curl or become deformed, that could be a sign that they're overstimulated, that there are too many nutrients in the soil. Stop feeding your plants until they’ve had time to recover.
Problems with Water
Wilting leaves typically mean the seedlings are not getting enough water, and yellowing leaves can mean they're getting too much. Adjust your watering as needed.
Problems with the Seed Itself
Whether it’s just one seed that’s not germinating for you or an entire tray of the same type of seed, you might blame yourself when it’s really an issue with the seed. Seeds can be too old or unhealthy to germinate.
If you’re having trouble with germination, check the quality of your seeds and the best-by date on the seed package. Consider buying a different variety or a different brand altogether.
Remember, if something doesn’t go right, it’s not a failure; it’s a lesson. Do your best to figure out what went wrong, change something up, try a different solution, and try, try, try again!


How to Pot Up Your Seedlings
Your seeds were meant for bigger things than a small cell in a seed starting tray. If your plants are outgrowing their container but still need more time inside before they can be moved outside, it may be worthwhile to pot them up. You don’t want to leave a plant in a too-small space and end up halting its growth.
To make it worth the stress of moving a plant to a different container, the new pot should have at least double the growing space available. When my seedlings need a bigger home, I poke drainage holes into the bottoms of paper cups, which are basically four times wider and two times taller than a cell. That means significantly more space for roots to spread out. You can also find simple paper pots and coco coir pots at garden centers, and unlike plastic cups, these can be planted directly in the soil to prevent transplant shock. I recommend ripping off the bottom of the pot before planting to make things easier on the roots.
Steps to Pot Up Your Seedlings
Step 1: Mix Potting Soil & Worm Castings
Fill up the pot or container with organic potting soil mixed with a dash of earthworm castings. Add water to the mix so that the soil is ready to receive the new seedling.
Step 2: Thin Extra Seedlings
If multiple seedlings have germinated in the same cell, use this opportunity to pluck all but the strongest-looking one.
Step 3: Transfer the Seedling
Make a hole for your seedling in the center of the container that's the width of the cell the seedling is currently in. Do this before you pull your seedling from its current container because its roots and stem will be fragile.
When it’s time to remove your seedling from its cell, pretend you’re a baker gently easing a muffin from its baking tray that wasn’t properly greased. Use a spoon or small tool to run around the edge of the cell and loosen the seed starting mix. Your goal is to avoid disturbing the roots as you pop the seedling from the cell. If a plant doesn’t want to come out, reach under the tray, stick your finger into the small drainage hole, and gently push up.
Tuck your seedling into the hole you made in the new container. Push some soil around the plant so that it’s supported but its crown (the place where the stem meets the roots) is not covered. Thanks to this extra step, your seedlings now have room to grow to their full potential.
Grow our favorite seeds with us!
Get 10 of our easiest & most productive garden seeds for FREE. All you have to do is pay for shipping and handling, and we'll deliver them right to your mailbox.
How to Harden Off Your Seedlings
Once your seedlings have 3 to 4 true leaves, they're ready to head outdoors and experience true nature. But before you transplant them to the garden, you have one more task on your to-do list. You have to harden off your seeds.
If you were to simply plant all your seedlings outdoors tomorrow, you risk giving them transplant shock. Those shocked seedlings might never turn into healthy and productive plants for your garden, even after all the work you've put into them.
Hardening off is the gradual process of transitioning your plants to the great outdoors so that they’re ready when the time comes. The goal is to gently expose plants to the conditions they’ll experience full-time in the coming days (think: direct sunlight, wind, fluctuations in temperature). You'll start hardening off your plants about a week before you transplant them to the garden. Follow this schedule:
- Day 1: Place seedlings in protected and shaded spot outdoors for a couple hours, then bring them back inside.
- Day 2: Repeat but leave seedlings outdoors for 3 to 4 hours.
- Day 3-6: Each day, allow your seedlings to stay outside longer and be exposed to slightly more sun.
- Day 7: Leave seedlings all day as close to the garden space as possible. They're ready for planting tomorrow.
Learn more about hardening off your seedlings.
Planting Tips
- Add some fresh compost to the soil surface before planting.
- Few plants like having their roots messed with, but some plants are more sensitive than others. If you started something like cucumbers or squash indoors, be really careful when you're transplanting them.
- Dig a hole that's deeper than the seed starting cell when planting tomatoes. You can actually encourage tomatoes to grow more roots and form a stronger foundation by burying the stem all the way past the first set of leaves.
- The first 2 weeks after transplanting seedlings to the garden are critical. You'll want to water them every day, or at least every other day, until they get established.
Indoor Seed Starting FAQs
Should you soak seeds before planting?
Most seeds don't need any special treatment before you sow them. Seeds with tough seed coats, however, benefit from soaking in room-temp water overnight (or up to 12 hours) before planting. These seeds include beans, corn, okra, and peas. The water begins breaking down those thick outer coats, which speeds up the germination process.
What month do you start seeds indoors?
The best month to start seeds indoors depends on which plants you want to grow and the climate you're gardening in. Look up your last frost date. Many of the most commonly grown plants are started about 6 to 8 weeks before your last expected frost date. That gives seedlings enough time to grow and be ready to transplant outdoors as soon as the frost date has passed.
Is February too early to start seeds indoors?
Depending on where you live and what type of plants you want to grow, February can be a great time to start seeds indoors in preparation for spring gardening. Gardeners who live in colder climates might need to wait a bit longer before starting plants that can't handle frost, as there is such a thing as starting plants too early. Gardeners who live in warmer climates may actually want to start their seeds in January (or even December) in order to be ready for their last frost date.
Do seeds started indoors need sunlight?
Your plants will need light, but not necessarily sunlight. I've actually found that seedlings grown indoors with just sunlight from a windowsill tend to be less robust than those grown under LED grow lights. Seedlings like their light source to be very close to them and left on for 12 to 14 hours a day.
Can I leave my grow light on 24 hours for seedlings?
The goal of seed starting indoors is to mimic nature, so there is a limit to how long you should leave lights on. Mimic nighttime by turning your grow lights off for 6 to 8 hours. This gives your seedlings time to recharge for another full day of growing ahead.
Why are my seedlings leggy?
Seedlings can become leggy (too tall and narrow) for several reasons: they're not getting enough light, they're overcrowded, or they're feeling too warm. Try moving your grow lights closer to the seedlings (or keeping it on longer each day), thinning your seedlings, and/or removing any heat mat underneath your seed starting tray.
Time to Start Some Seeds!
Well, friend, you now have the basic knowledge you need to turn tiny seeds into your own plants in just a matter of weeks. I say basic knowledge because you’ll continue to learn each gardening season and refine your technique. (If you're interested in learning more about soil blocking as a seed starting technique, I have a full tutorial HERE.)
You’ll now be able to grow a much wider variety of plants for your garden than you could find at the garden center. You’re 100% in charge of the types of plants that can go into your garden and when they’re available. And that's huge!
Now, go put your hands in some seed starting mix and dig in!

Join the Spring Garden Startup Workshop
Click on the image below to save this post for later!

